When you’re first learning Apps Script, one of the most confusing topics is understanding why things happen in the order they do.
You write a script to do A, then B, then C, but it waits until the very end to show you anything.
The key is understanding the interplay between Google Sheets in your browser and the Apps Script that runs on the Google servers.
Let’s jump into a simple script to illustrate the issue.
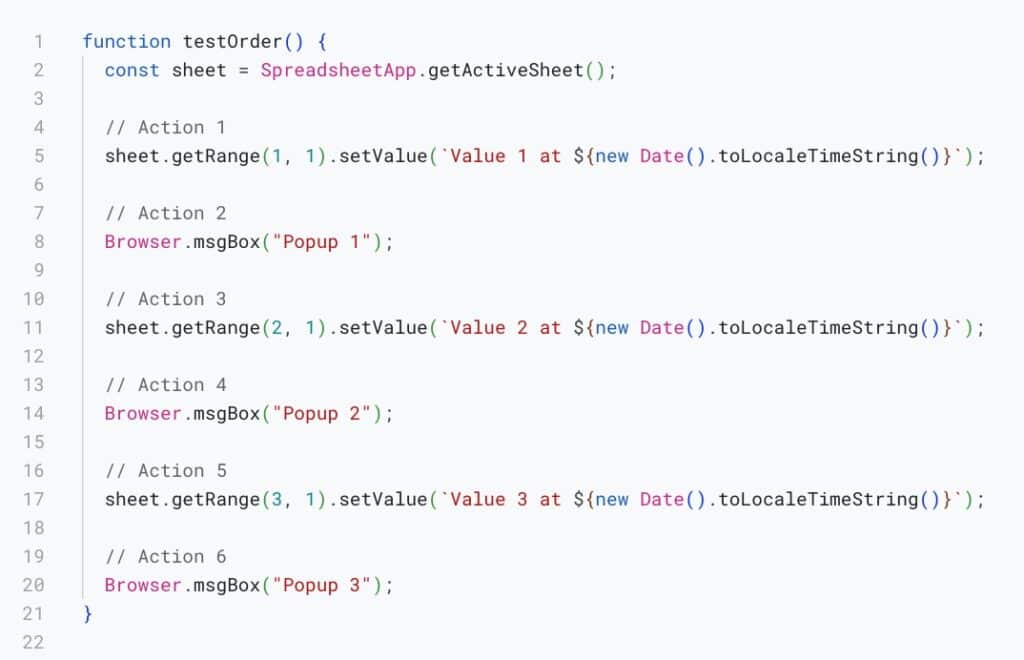
Test Order Script
Take a look at this code (available in the template) and try to guess what might happen:
We might expect this:
- The text “Value 1 at…” immediately appears in cell A1.
- A popup that says “Popup 1” appears.
- You click OK.
- The text “Value 2 at…” immediately appears in cell A2.
- A popup that says “Popup 2” appears.
- You click OK.
- The text “Value 3 at…” immediately appears in cell A3.
- And finally, a “Popup 3” appears and you click OK.
The Reality
But let’s see what actually happens:
When we run the script, we get a very different result.
The “Popup 1” popup appears. We click OK. We wait but the sheet remains stubbornly blank.
Then, the “Popup 2” appears. And then “Popup 3”!
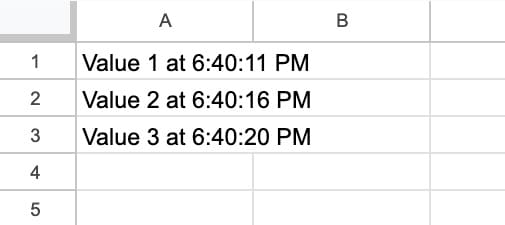
It’s only after we click OK on this third popup that the rows then all populate with their values at the exact same time.
Why Does That Happen?
The timestamps with Value 1, Value 2, and Value 3 clearly show they were created seconds apart, but they all appeared at once.
This is a feature of Apps Script and it reveals one of the most important things to understand about how it works.
It’s All About the Server
The key thing to know is that our script runs on Google’s servers.
Think of it like having an assistant in the room next door.
We walk in there and give them a list of jobs to do:
- Write “Value 1” on the whiteboard.
- Hold up a “Popup 1” sign and wait for me to give you a thumbs up before proceeding.
- Write “Value 2” on the whiteboard.
- Hold up a “Popup 2” sign and wait for me to give you a thumbs up before proceeding.
- Write “Value 3” on the whiteboard.
- Hold up a “Popup 3” sign and wait for me to give you a thumbs up before proceeding.
The assistant is doing every task in the correct order.
But they don’t show us the whiteboard after every single change.
It’s more efficient for them to finish the entire list of jobs and then show us the fully updated whiteboard at the end.
This is exactly what Google’s server does.
To save time and resources, it batches all the user interface changes (i.e. changes to our Sheet) and sends them to our Sheet in one single update after the script has completely finished.
Forcing the Order with Flush
Now for the good part.
How do we tell our assistant to show us their work-in-progress? How do we force the spreadsheet to update when we want it to?
Simple. We use the command SpreadsheetApp.flush().
The flush() method is like telling the assistant, “Stop whatever you’re doing and show me the whiteboard now.”
It forces Google’s server to immediately apply all pending visual changes to our Sheet!
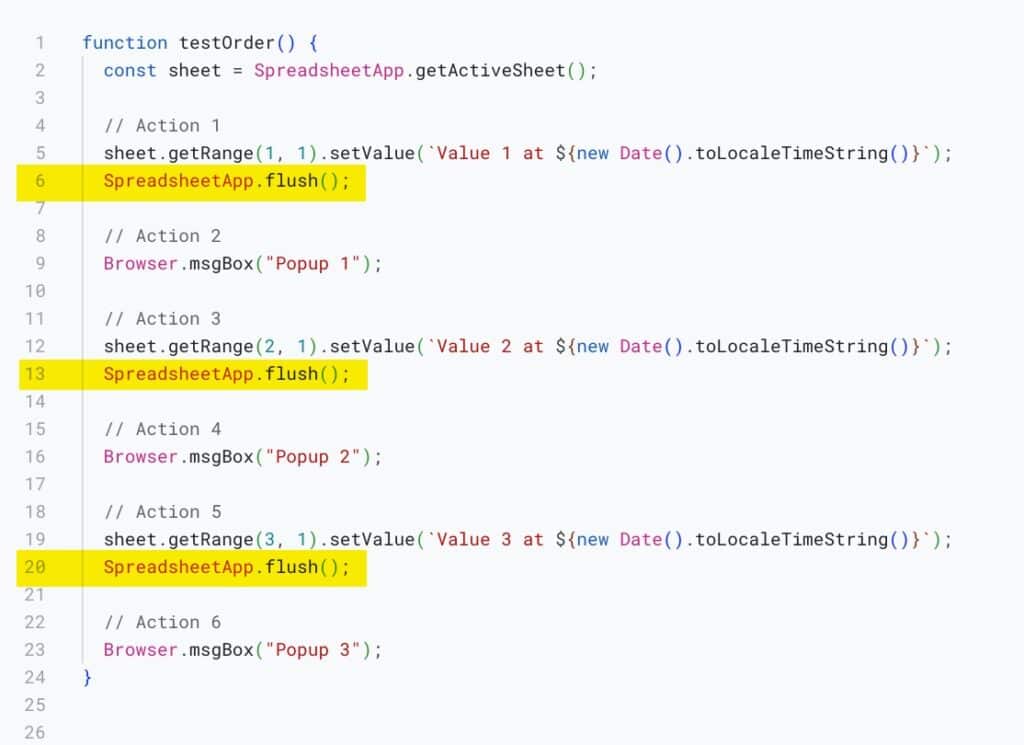
We add a flush() method after each setValue() line, shown in yellow in this image:
Now, when we run the script, this is what we see:
This time we see Value 1, Popup 1, Value 2, Popup 2, Value 3, Popup 3. It matches the order in the script.
This principle is the same whether we have two steps or a hundred.
Let’s look at a practical, real-world example: a status checker.
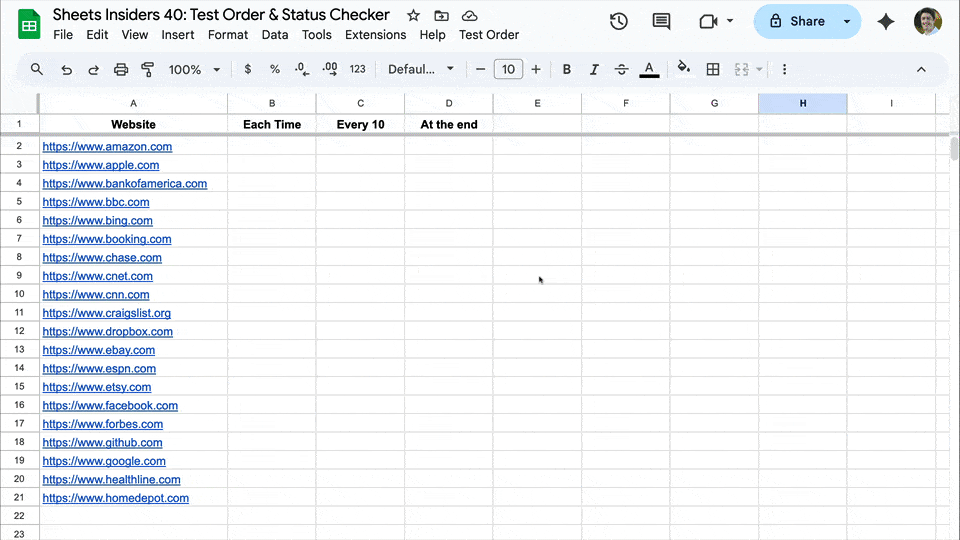
Status Checker
Imagine we have a list of website URLs in Column A of our Sheet. We want to create a script that checks each URL to see if the website is online and then writes “Online” or “Error” in the adjacent column.
It takes a few seconds per website, so it might be helpful to show real-time feedback as the checks happen, rather than wait until the end.
We set up three tests:
- a real-time, line-by-line approach in column B,
- performing the operations in two batches of 10 in column C,
- and waiting to show all of the results until the end, in column D.
The column B approach is the most user-friendly. Users have confidence that it’s working and can estimate how much time is left.
Can you guess which one makes heavy use of the flush() method?
Yep, the first test in column B makes use of the flush() method on every line, whereas flush() is only used twice for column C (after each block of 10), and not at all in column D.
But column D is the quickest overall, because it’s more efficient to batch all the Sheet updates in one go at the end.
And there you have it.
You’ve just learned one of the most fundamental (and often confusing) concepts in Google Apps Script.
Hopefully now, with the knowledge of this flush() method and and understanding of how the order of operations happens in Apps Script, you can pick the best approach for your situation.
Template for Test Order and Status Checker Scripts
Download the Test Order & Status Checker Template
Click on “Use Template” in the top right corner to make your own copy.
To view the Apps Script, go to the menu: Extensions > Apps Script